The LDAP Manager Administration function will allow Administrators to synchronize and pull in users from an LDAP server. This will also allow for authentication of users accessing the Cistera server via the LDAP Server.
Before creating new users within the Cistera System, the user’s roles and capabilities should be defined in the Role Manager. The Role Manager will define which applications the user can access and the functions they can perform within those applications. For detailed information on created user Roles within the Cistera system – please refer to the Creating User Roles documentation.
The first step in interfacing with the LDAP system is configuring the Customers’ LDAP source(s) so the users can be sync’d into the Cistera System. To configure the LDAP Source – follow the steps below:
- Log into the Cistera Server with the Administrator Login and Password. The Cistera URL to log into will be: http://<IP Address>
- Select the System Manager Tab from the upper left part of the screen.
- Select the LDAP Manager pull-down and Configure LDAP Sources.
- Click on Create LDAP Sources.
- A pull-down will come up – select the LDAP Source type. IE.. Active Directory, CCM,….
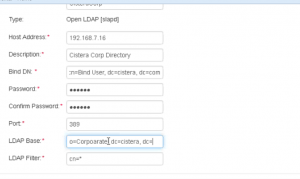
- A template will be displayed. Fill-in each box for the LDAP Source Parameters – please note that an asterisk (*) denotes a required field. The information for this section should be provided by the LDAP Administrator for the customer.
- The next sections should be filled in as needed. Below is an example of some Field Mapping fields.
- User ID – uid
- Last Name – sn
- First Name – giveName
- Department – departmentNumber
- When the sections are complete – select ADD.


Once the LDAP Source has been added to the system. The next step is to synchronize to the LDAP server and bring in the list of Users. Once the list of users have been brought into the Cistera LDAP Users list – they can then be added into the User Manager to and assigned the roles. Refer to the User Manager documentation for more details on Add/Editing users.
To synchronize to the LDAP Source – follow the steps below:
- Log into the Cistera Server with the Administrator Login and Password. The Cistera URL to log into will be: http://<IP Address>
- Select the System Manager Tab from the upper left part of the screen.
- Select the LDAP Manager pull-down and Synchronize with the LDAP Tree.
- Click on Synchronize with LDAP
When completed – an entry in the table will list Updated Users / New Users and any errors that may have occurred. Many of the errors are associated with the properties in the LDAP Source such as BIND DN, LDAP BASE and LDAP FILTER along with incorrect entries in the FIELD MAPPING. If the errors continue, please contact Cistera Support for assistance.
Once the LDAP Source has been added to the system and the Users List has been Synchronize and brought in – the next step is the “create” those users profiles within the Cistera User Manager.
This is done by finding the user(s) and creating their profile. Once their profile is created – they are now in the User Manager and can be assigned Roles and Privileges within the Cistera System.
To create the User Profiles – follow the steps below:
- Log into the Cistera Server with the Administrator Login and Password. The Cistera URL to log into will be: http://<IP Address>
- Select the System Manager Tab from the upper left part of the screen.
- Select the LDAP Manager pull-down and LDAP Users List.
- A list of all of the users should be displayed. The NAME, DEPARTMENT and EXTENSION can be used as search criteria to find and select the user(s) that you would like to create profiles for.
- Once you have the user to create a profile – check the box next to the user and select Create User Profiles.
- The user will be added to the Cistera User Manager. The User can now be assigned the proper roles and restrictions.
Refer to the Cistera User Manager documentation for additional details on how to configure users and roles.
